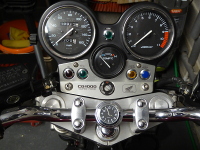
"Big One" Restoration; January 2018
Gallery
Resurrecting the Big One
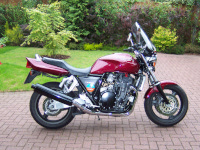
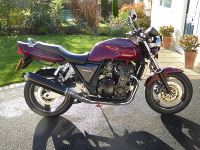
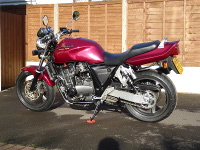
Back in 1999 I bought a 1995 Honda CB1000FS or "Big One" as it is affectionately known, from a guy in Frome. I still have it and by my reckoning it's 23 years old. My service history spreadsheet (yes, I keep a spreadsheet on all my bikes) tells me I that acquired the bike 16th April 1999 and that, at that time, it had done 3,250 miles. I had always wanted a muscle bike and the bike was in great condition. At around £3,300 it was a very good deal. Between 1999 and 2011 I did around 47,000 enjoyable miles on it including several rallies and at least one trip to Europe. Today the odometer reads 49,913 miles. It has never let me down but as time went on it developed little annoying issues and I started to favour my other two bikes. Eventually I stopped riding the Big One early 2011. Truth be told I had let it run down a bit. I had left it standing for 3 years in the garage of our old house and for a further 3+ years outside our present house in all kinds of weather under an inexpensive motorcycle cover. By the way, I can recommend a Held motorcycle cover. The cover, and a liberal application of a rust preventative, did a very good job at preserving the bike. So when I had laid up the bike there was nothing major wrong with it but annoyingly it wouldn't tick-over smoothly and the engine rattled a fair bit.
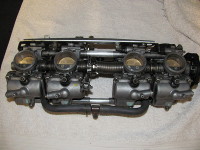
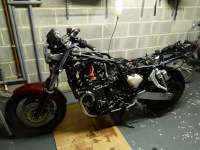
The first thing I did was to set about extracting the bank of 4 carburettors for cleaning. This proved to be a bit tricky as the air-box refused to leave the frame. After dislocating a couple of the carburettor boot tubes it gave up and came free. I took the carburettors to a garage down the road for cleaning and they came back looking prime. However, the carburettors refused to fit back into the rubber hose on the inlet manifolds. You see the 4 rubber hoses on the inlet manifolds had lost their elasticity over the years (as rubber does) and it was impossible to push the bank of 4 carburettors back on. I briefly considered splitting the carburettors so that I could push them back on one at a time but quickly discounted this on the basis that it would be difficult to reattach and re-synchronise the 4 carburettors. Plan A involved using a silicone spray to elasticise the rubber but this was a dismal failure. (On YouTube you'll find guys advocating all sorts of potions for restoring your rubber!) Plan B involved using a hair dryer to heat the rubber and although this showed promise it didn't quite work (and the wife wanted her hair dryer back). Building on plan B with brute force, I bought a heat gun and plan C involved using it at its highest setting. This loosened up the rubber hoses sufficiently to enable the 4 carburettors to be pushed into the rubber hoses on the inlet manifolds. The choke was very stiff so a replacement choke cable was fitted and oil was liberally applied to the choke linkage which sorted that out.
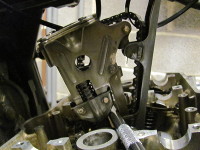
Hondas of that era often developed a rattle which was due to either a cam chain tensioner (CCT) not doing its job or an overstretched cam chain (more an issue with manual CCTs as they have no give in them). Unlike my more modern Hondas, the CCT is located deep within the bowls or the engine and to get at it you need to remove both camshafts. Not a difficult job for people who do it all the time but for me a job to be taken very carefully and slowly to avoid dropping a nut or something similar down into the engine. If that were to happen it would mean removing, splitting and rebuilding the engine and I really didn't fancy that. After extracting the CCT I found it to be in quite good condition. However, one of the problems with the CCT is that it uses an oil filled dashpot to dampen its action and this over time has a tendency to get clogged with "dirt" and jam which stops the CCT from doing it's job properly. So the main thing I did was to clean the dashpot and prime it properly with clean oil after I had re-installed it and the camshafts. I was hoping that this would be all that was needed to cure the cam chain rattle as changing the cam chain is not straightforward. You either use a split-link cam chain and pull it through by attaching it to the old cam chain or split the engine to fit an endless cam chain. Split-link cam chains are controversial and it would be a very fiddly job with every chance of something being dropped into the engine. The coward in me decided that with a little under 50K miles on it that the cam chain would be fine. It did concern me that the cam chain was hanging a bit loose on the cam sprockets after I put everything back together so it was a case of fingers crossed. Before fitting the rocker cover I correctly gapped the 16 valves. These are of the lock nut adjuster type so this was straightforward to do.
With the carburettors reattached and the engine back together, before starting her up I:
- Changed the engine oil and filter
- Changed the coolant
- Changed the spark plugs
- Changed the air filter
- Changed the brake and clutch fluid (the pads were OK so I just cleaned them)
- Changed the battery (I'd been charging the old one in the garden shed using a solar powered charger but it was past it)
- Inserted a fuel filter in the fuel feed (as the carburettors were found to have dirty fuel in them)
- Treated a nasty bit of rust that had developed at the back of the steering head with POR-15 rust preventative paint
- Re-sealed the airbox carburettor boot tubes that I had managed to dislocate when removing it
After I had done the above I hooked up an axillary fuel tank and cranked over the engine with the HT leads disconnected. After that the HT leads were connected and she started first time! After warming up the engine she was smoothly ticking over and the cam chain was much quieter.. Minster Mechanics did a great job with cleaning and setting the carburettors.
After that came a lot of cleaning, painting and putting the bike back together. The chain looked good after a good clean but I did change the clunky front sprocket for a new quiet sprocket. The main and side stands, the front radiator grill, the shock absorber springs and various other cycle parts were treated to POR-15 rust treatment and top coat. It all came up came up nice but POR-15 is not cheap especially when you find out you need a top coat because the rust preventative is not UV tolerant. The petrol tank needed a bit of touching up after previously being repaired for a leak. (A POR-15 3-stage treatment was used to fix the leak.) Why is bike touch-up paint so expensive? I'll get around to spraying the original exhaust can when the weather improves as although unmarked, the original paint has come off in places.
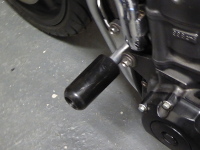
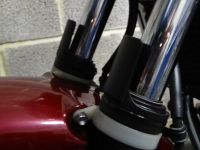
New tyres are always an issue with the Big One because Honda thought it was a good idea to fit it with a non-standard 18" inch wheel. Only two tyre manufacturers, Bridgestone and Dunlop, do an 18" rear tyre. I chose the Dunlop Sportmax Roadsmart IIIs as they seemed to be getting better reviews. I have a 17" CBR1000F wheel and one day I'll get around to swapping out the 18" rear wheel. Finally I fitted a tank pad, some Chinese crash bobbins, a clock and fork protectors. (Apart from the tank pad, all were bought cheaply from eBay.) I'm now just waiting for the weather to improve before MOT'ing her. (Is that the cam chain I can hear tinkling away?)
